
Step 01
Choose a frame
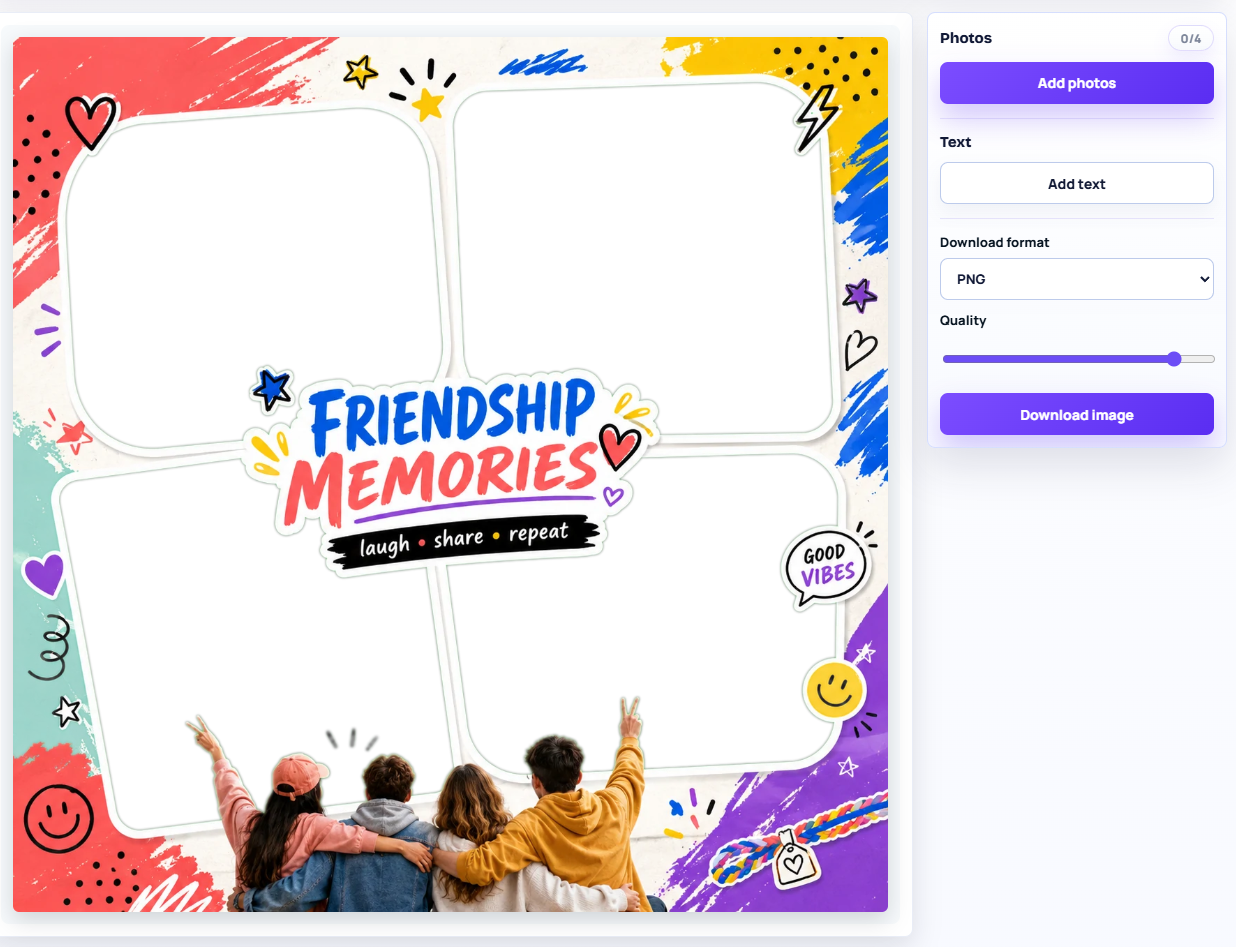
Start from a birthday, anime, love, family, travel, or card template. Open the template that matches your moment and the editor will load it at the correct ratio.

MRRFrame Account
MRRFrame Guide
A practical walkthrough for choosing templates, adding photos, editing text, and downloading your finished design without uploading private photos to the website.
Start from a birthday, anime, love, family, travel, or card template. Open the template that matches your moment and the editor will load it at the correct ratio.
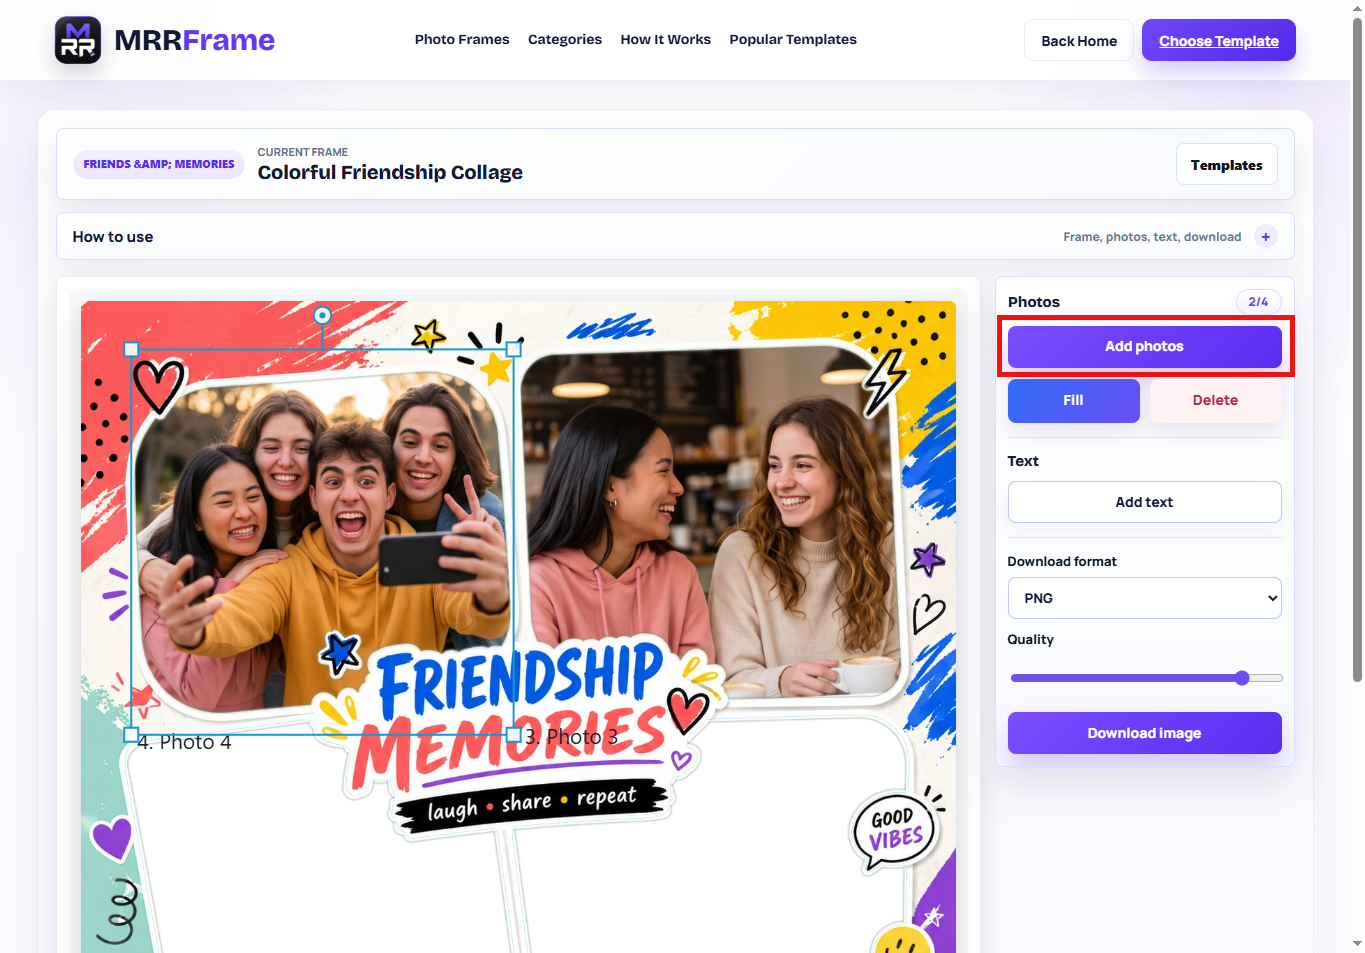
Click Add photos, select your images, then place each photo inside the visible frame area. Use Fill to cover the slot cleanly, and Delete to remove the selected photo.
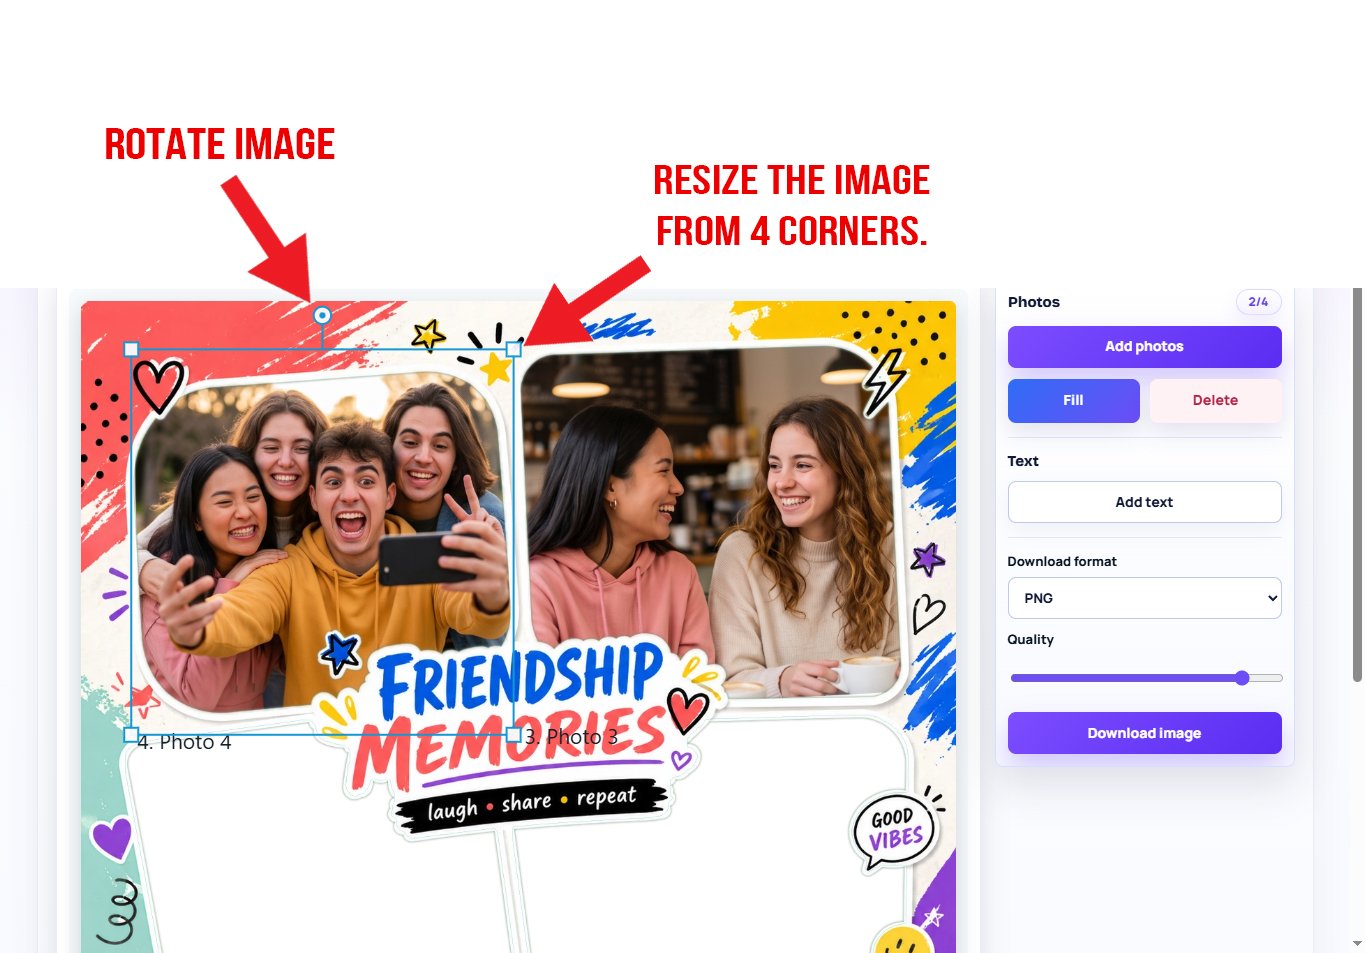
Drag a photo to reposition it, pull the corner handles to resize, and use the round handle to rotate. On mobile, pinch to zoom the whole preview and pan around the canvas.
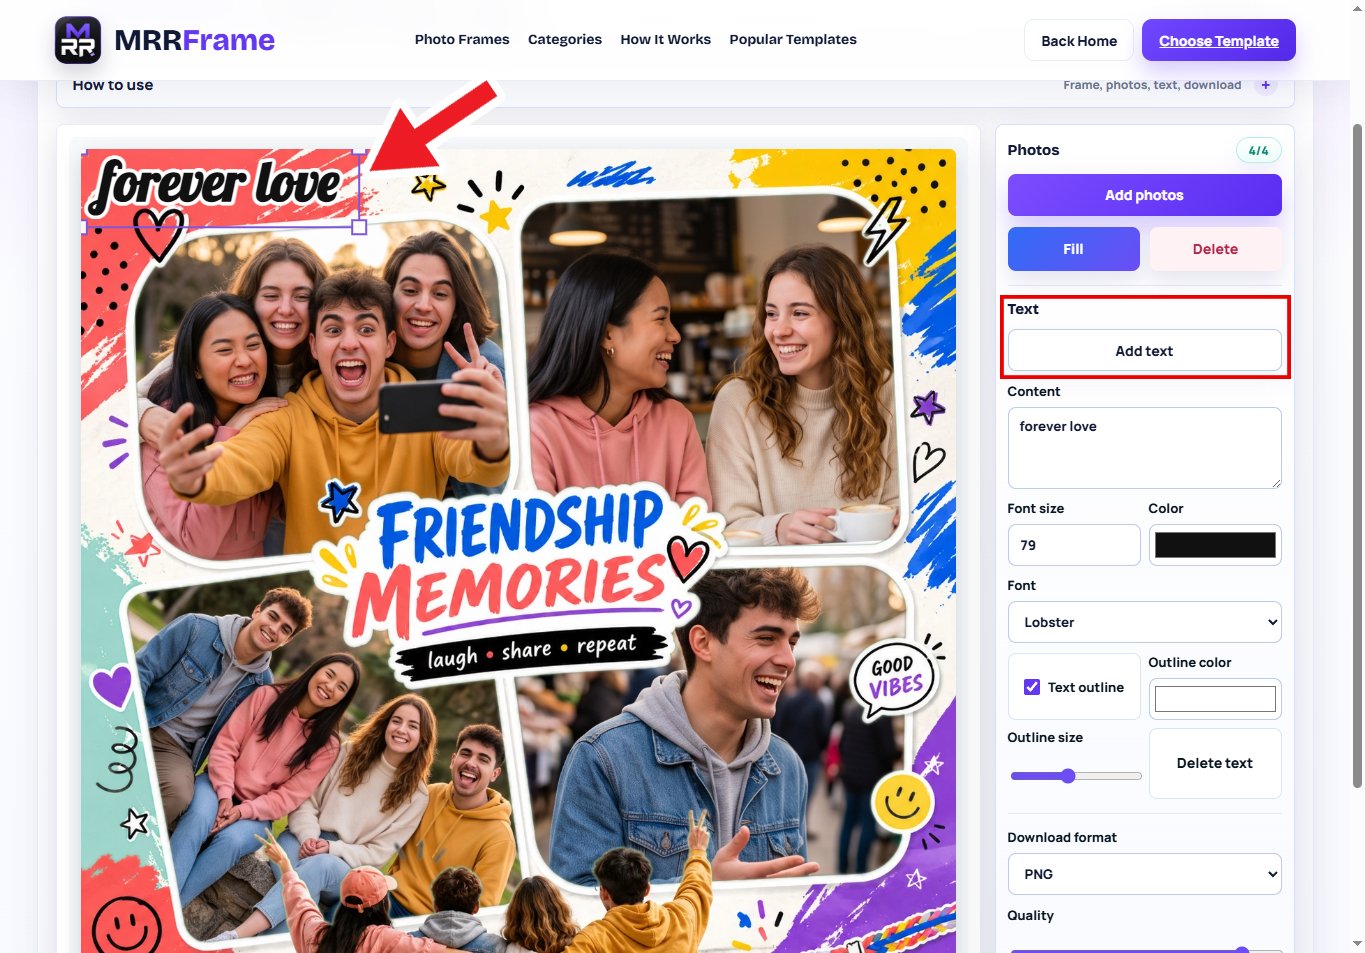
Add captions, names, dates, or character details. Double-click text to edit it, style it with fonts and outlines, then export a PNG image ready to share.
Use PNG for the most familiar download format. If a wide template feels small on mobile, use two fingers to zoom the preview, then tap Fit screen when you want to see the full design again.